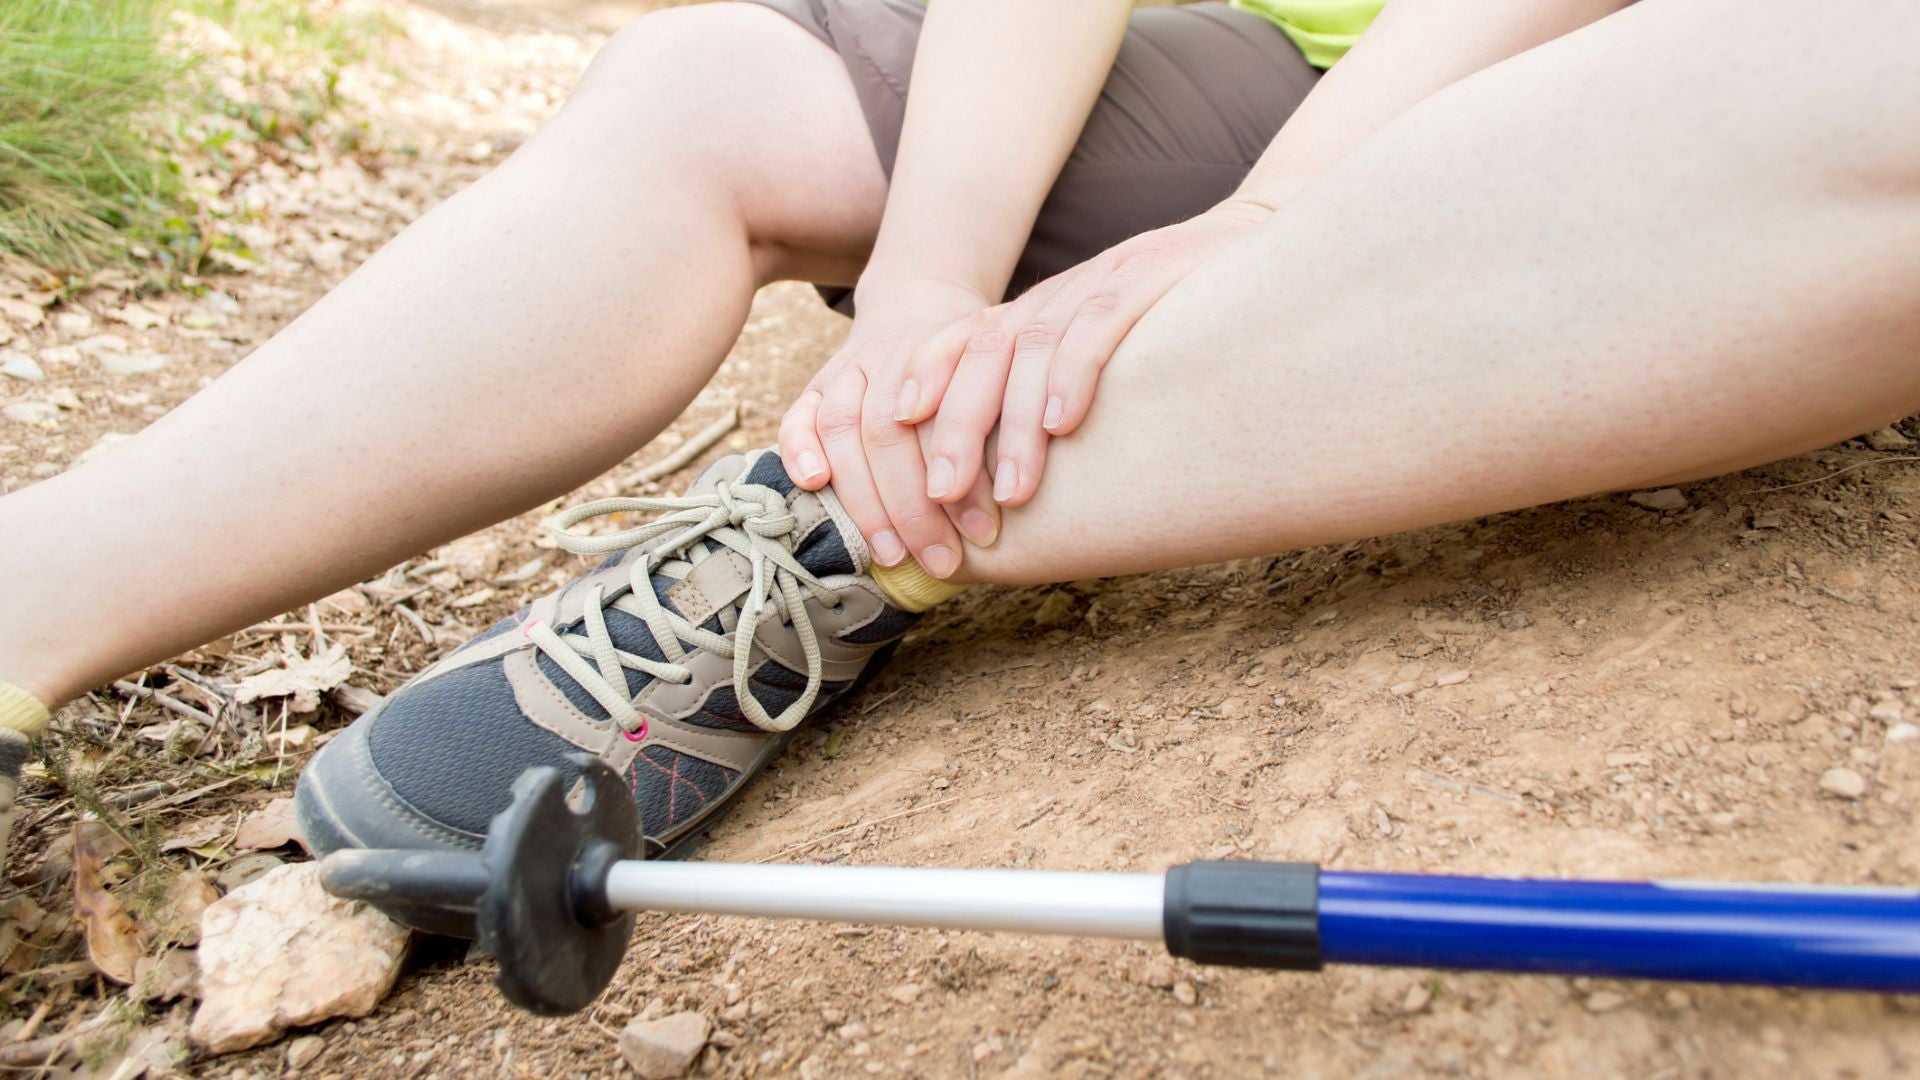
Did you know blisters are one of the most common injuries in the outdoors and the most common injury for hikers? Within hours, a small rub in your boots can turn into a painful blister. However, with a few basic preventions tricks and early treatment, you can protect your feet and keep a blister from interrupting your adventure.

Blisters are the hiker’s #1 injury
Blister Prevention
To keep blisters from developing in the first place, eliminate as many contributing factors as possible. Simple actions taken before you hit the trail and once you’re on the trail can make a huge difference.Before You Hit the Trail
The first step in preventing blisters it to make sure the gear you’re putting on your feet isn’t causing the problem. Here’s five steps you can take before you hit the trail to stop blisters in their tracks:- Make sure your shoes fit properly. If your shoes are too tight you’ll have pressure sores, while shoes that are too loose lead to friction and irritation. Outdoor retailers like REI often will be able to measure your foot and help you find the right size using a calibrated fit device. A good check you can do yourself though is to pull the insoles out of your shoes and stand on them. You should have a thumb’s width of clearance between the end of your toes and the insole. You want that extra space in the front of the boot so you don’t end up jamming your toes against the toe box on the way down.
- Choose your socks with care. As a rule, avoid cotton socks and opt for water-wicking materials like merino wool or synthetics. Everyone has unique feet, making it important to find what works for you and your boots. Sock height, cushioning, and fit all contribute to giving your feet the best in-shoe experience. REI gives some great advice on choosing the sock that’s right for you.
- Break new boots in. Even the right footwear can still cause blisters if you don’t break it in. Before heading out on a trip, make sure to spend some time in your new boots, ideally while wearing the socks you’ll use on the trip. You might look funny walking around your home or the office in hiking boots, but your feet will thank you later. Once you’re ready to hit the trail, best practice says start with a short hike – you don’t want to find out you didn’t break them in enough when you planned a 15 mile day.
- Avoid prolonged wetness. Moisture breaks down your skin and predisposes it to blistering (that’s why choosing the right sock is so important). Keep your feet dry, and pack an extra pair of socks so if you’re first pair get wet (those mountain streams are everywhere), you can swap out for a dry pair right away.
- Protect problem areas. No one knows your feet like you do – if you are prone to blisters in a certain area, be proactive about protecting that area from harm. Before hiking, apply moleskin to sensitive areas where blisters are likely to occur. The moleskin will reduce the friction against your skin, effectively stopping blisters and hot spots before they can even start.
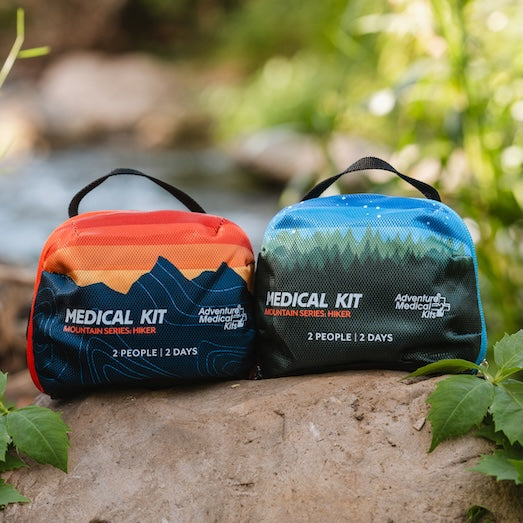
Even if you put moleskin on your feet before setting out, it’s always important to pack more in case the unexpected occurs. If you are prone to nasty blisters, consider adding GlacierGel to your first aid kit as well, as the hydrogel dressing is ideal for stopping the pain from and protecting fully-formed blisters. The Blister Medic contains both moleskin and GlacierGel, making it a lightweight addition to your pack that keeps you prepared. Make sure to go through your first aid kit before setting out to make sure you don’t need to re-stock blister items.
On the Trail
Once you hit the trail, there are still things you can do to prevent blisters. Hot spots are sore, red areas of irritation that develop into blisters if allowed to progress. Identifying hot spots early to stop them from becoming blisters will save you miles of pain.
The key message? Pay attention to your feet. It’s easy to ignore slight irritations or brush them off in order to avoid having to stop on the trail, but take our word on it: you don’t want to ignore hot spots. If you think you feel a hot spot, take the time to stop and address it sooner than later.
Treating Hot Spots
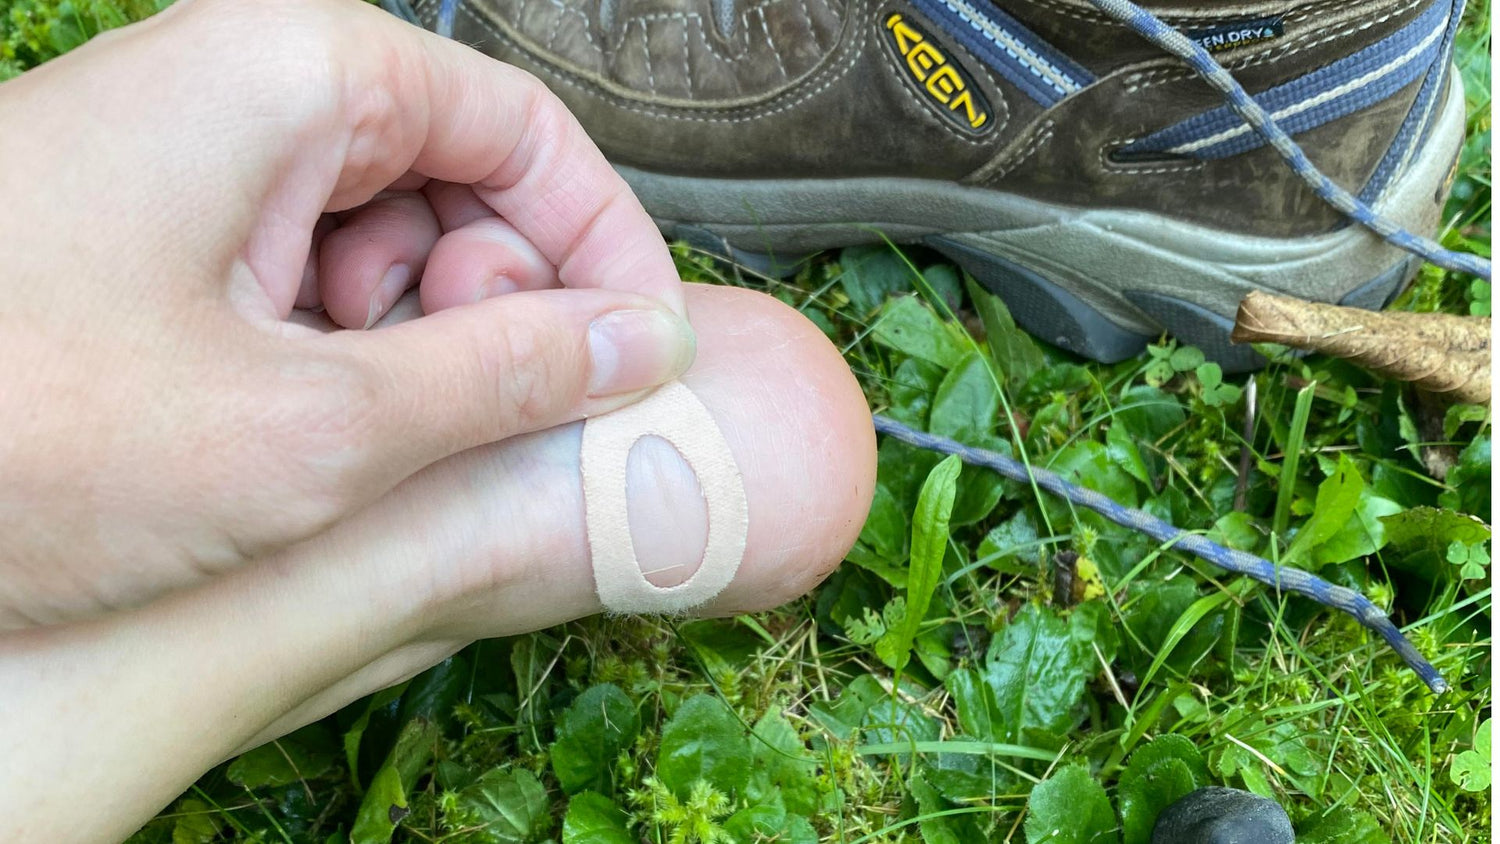
If you catch a hot spot early on, you can easily stop it from becoming a blister by covering it with a small piece of moleskin.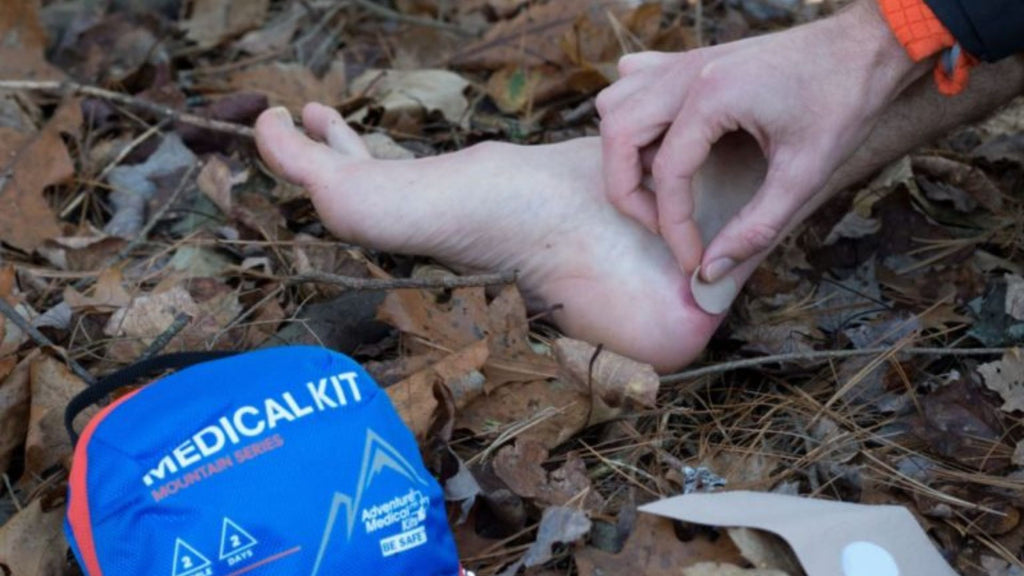 Treat small hot spots by covering them with moleskin, which is included in the Hiker kit.
For more irritated hot spots, you can cover them with GlacierGel or use moleskin. Whichever you use, make sure to prep the surrounding skin using an alcohol wipe for maximum adhesion. If you use moleskin, make sure to grab a donut-shaped piece (you can get them pre-shaped here or simply cut a small hole in the center of a rectangular piece).
Position the moleskin so the hole is over the hot spot, making sure the adhesive surface isn’t touching the irritated skin. This raises the area around the hot spot, preventing further rubbing. If necessary, you can secure the moleskin in place with medical tape from your medical kit.
Blister Treatment
Sometimes blisters occur despite our best efforts. Properly treating the blister can help minimize pain and further damage to the area.
For Small Blisters
If the blister is still intact, do not puncture or drain it. Instead, follow the same steps outlined above on treating serious hot spots by protecting it with GlacierGel or moleskin. If you’re using moleskin, you may need to use several layers, as the moleskin doughnut needs to be higher than the blister to be effective.
You may need to use several layers of moleskin to get above the blister
For Large or Ruptured Blisters
If the blister is large but intact, puncture it with a clean needle or safety pin at its base and massage out the fluid. The fluid contains inflammatory juices that can delay healing.
Once you’ve punctured the blister (or if you’re dealing with one that’s already ruptured), trim away any loose skin from the bubble and clean the area with an antiseptic towel or soap and water. You should then apply antibiotic ointment and cover the area with a non-adherent dressing or GlacierGel to prevent contaminants from entering the wound and to promote healing. GlacierGel dressings help protect and heal ruptured blisters.
You can then use moleskin (or molefoam) to protect the wound from further rubbing. Use a doughnut-shaped moleskin to raise up the area around the blister – remember to use enough layers to raise the moleskin above the height of the blisters with its dressing. Secure the moleskin in place with medical tape.
You’ll want to change the dressing every day and keep a close eye on it for infection. Signs of infection include redness, swelling, increased pain, or a cloudy fluid under the dressing. If infection occurs, remove the dressing and allow the area to drain. Consult a doctor as soon as you are able.
- Trim away any loose skin from the bubble and clean the area with an antiseptic towel or soap and water.
- Apply antibiotic ointment and cover with a non-adherent dressing or other dressings like Glacier Gel.
- Utilize Moleskin to protect the area. Take a small piece of moleskin and cut a circle in the center approximately the same size as the area.
- Center the oval over the hot spot and secure into place with tape. This will act as a buffer against further rubbing. Change the dressing every day.
- Inspect the wound daily for infection-this includes redness, swelling, increased pain, or cloudy fluid under the dressing. If infection occurs, remove the dressing and allow the area to drain. Consult a doctor as soon as you are able.
Gluing a Blister
If you are far from help and must continue walking for an extended period of time, an alternative treatment is to glue the blister in place. This method is initially painful but can be effective in backcountry scenarios, especially if you’re low on typical blister first aid supplies.Begin by draining the blister of fluid. Then, place a small amount of tincture of benzoin (or glue if that’s all you have) in the drained blister. Press the loose skin overlying the blister back into place and cover the site with a suitable dressing (if you have nothing else, duct tape can work). The extreme pain produced by the benzoin on your skin will only last a few minutes.
 Tincture of benzoin is included in the Ultralight/Watertight .7 kit